Craving a Classic Ice Cream Adventure?
We all know that feeling, right? You’re strolling down the street on a sunny day, and suddenly you get hit with that irresistible craving for something sweet. Maybe it’s a classic ice cream cone, but maybe a waffle cone is what your soul truly yearns for.
Whether it’s an afternoon treat or a party staple, there’s just something magical about a perfectly crispy chocolate-wafer cone that brings a smile to everyone’s face. And the best part? Crafting this iconic snack at home is easier than you might think.
Unleashing Your Inner Baker: The Recipe Breakdown
Let’s dive into the delicious world of homemade waffle cones and create something truly special. The beauty of making your own allows for customization, from choosing the right type of chocolate to playing with different flavor combinations for a unique twist.
Unmasking the Chocolate: A Guide to Choices
First things first, let’s talk about the star of the show: chocolate. You have options galore! Do you love the rich, melt-in-your-mouth experience of dark chocolate? Or do you crave the more playful, slightly sweeter notes of milk chocolate?
For our recipe, we’re going for a classic combination of melted semi-sweet chocolate. It offers that perfect balance between the richness of cocoa and a touch of sweetness—a real crowd-pleaser. The key is to use high-quality chocolate with a smooth texture so the final product doesn’t contain any grainy bits.
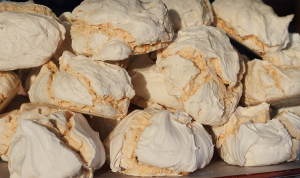
Crafting the Perfectly Crispy Cones: A Step-by-Step Guide
Now, for the heart and soul of our recipe—the waffle cone! It starts with some simple ingredients: all-purpose flour, sugar, baking powder, salt, butter, and a whole lot of love. Let’s break it down:
- Dry Ingredients: Combine the flour, sugar, baking powder, and salt in a large bowl.
- Wet Ingredients: In another bowl, cream together the butter and milk until smooth. Slowly add this to the dry ingredients, mixing until just combined.
- Emulsify: Gently fold in any additional ingredients like vanilla extract or coconut flakes for added flavor.
- Time for the Waffle Machine: Pour your batter onto a waffle cone maker and follow the machine’s instructions for cooking time. You’ll be rewarded with perfectly crispy cones.
The Final Touch of Deliciousness: Coating that Cone!
After your waffle cones have cooled slightly, it’s time to add a touch of magic—the chocolate coating! Dip each cone into a mixture of melted semi-sweet chocolate, ensuring it’s coated completely.
For an extra layer of indulgence, you can sprinkle some chopped nuts or mini chocolate chips on top before the final coat. It’s all about your personal preferences.
The Sweetest Part: Enjoying Your Homemade Treats!
And finally, the moment you’ve been waiting for—enjoy your delicious homemade waffle cones! Pair them with your favorite ice cream or whipped cream for a symphony of flavors and textures. It’s truly a taste bud adventure.
A Note on Experimentation
Don’t be afraid to get creative and experiment with different toppings, flavors, and variations! What might surprise you is just how unique your homemade cones can become —it’s all about making your own magic.